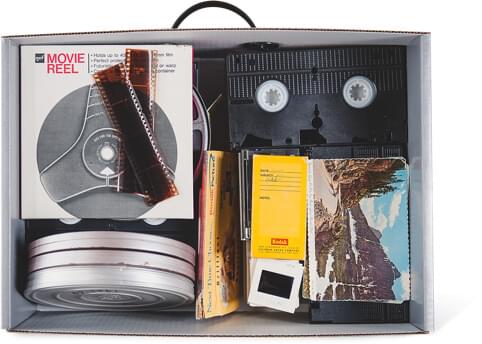

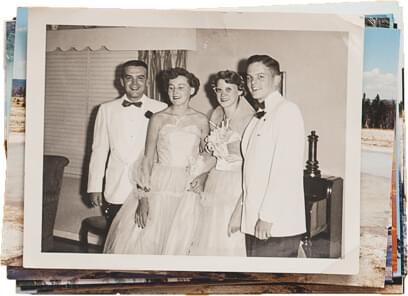

It’s more than likely safe to say that you’ve got a bunch of old family photographs lying around the house. Some may be displayed in picture frames on mantels or hanging on your walls. Others may be collecting dust in albums or cardboard boxes stacked up in your basement or attic.
In which case, there’s an even better chance that they haven’t aged gracefully over the years.
If you have old print photos that haven’t aged well (and if the above applies to you, then you do), then you may be wondering how to restore them to their former glory. After all, printed photos have a shelf life and photo paper and ink of the past isn’t nearly as good as it is today. Furthermore, if you’re not careful with how you store them, that life can be greatly exacerbated.
Luckily, you have a couple old photo restoration options, whether you’re looking at a photo restoration service or something a little more DIY.
Here’s what you can do to preserve those precious memories, giving them a little photo repair TLC.
Digital photo restoration
This is a DIY photo restoration process that can help you restore and digitize all your old photos – if you have the will and a little patience. It’s the perfect way to future-proof your memories. Ready. Set. Repair!
Prep your photos
Because your old photos have likely been in storage for several decades, it’s important that you do a little photo clean up to prep for your DIY photo restoration before scanning your first print. Simply take a lint-free rag and wipe the photo down to remove any dust or debris that could hinder the quality of the scan. If simply wiping off the photo doesn’t cut it (maybe there's mold damage), use a little bit of 89% isopropyl alcohol because it will dry fast without leaving streaks, stains or spots. Do not use water as that could further damage your print.
Scan the image into your computer
Connect a scanner/printer to your computer. Start running the scanning program by clicking the program’s name or hitting the scan button on your printer/scanner. The next step should prompt you to place in an image (photo) for scanning.
Prepare the image in photoshop (if applicable)
The beauty of today’s technology is that it affords users a variety of old photo restoration techniques not readily available to people years ago. Using Photoshop, you can add a wide range of filters and other editing options to help with photo repair and really bring your old prints back to life (i.e. color, sharpness, lighting, warmth, etc. that we’ll get to shortly).
Crop the borders
Because you’re scanning a physical photograph, the digital image of that photo is most likely going to have some type of border, especially if it’s a polaroid or slide. You’ll want to make sure you crop these borders off to give your digital photo a clean appearance. Simply adjust the crop feature until you feel like you’ve got the area around the photo just the way you want it.
Adjust brightness, fading and contrast
Old photos are going to tend to lose some of their luster, color and overall appearance over the years. You’ll want to fidget with the brightness and contrast to help bring some of that fading back into the digital version of the photo repair. Since every photo is different, there is no right way to adjust these settings, but it is important to not overdo them by blowing out the photo with too much brightness or diminish certain colors and tones by adding too much contrast.
Remove imperfections/erase lines and cracks
This is where digitally restoring your old photographs can get really innovative. If you’ve got an old photo that has a crease in it, mold spots, blemishes, etc., you can use Photoshop’s Spot Healing Brush Tool to help remove those imperfections. Just select your brush size and choose from the following type options, along with the area you want to fix. From here, you can do a proximity match or create a texture to help remove imperfections.
Recreate missing portions
Depending on how old a photo is can really determine the overall state of the print. Some old photos may be so worn that they’re actually missing portions of the picture. If that is the case for one or more of your photos, you can use the Clone Stamp Tool or similar tool to recreate a portion of the image and fill in the damaged sections. Just select the portion of the photo you’d like to recreate and click once. From here, you can repair the missing section with the copied area you just created. It’s an old photo restoration technique that can literally save your old prints.
Recreate lost shadowing and highlights
A common side effect of old photographs is the loss of shadowing from age and improper storage. Luckily, this can also be adjusted in Photoshop with the Burn Tool. This allows you to create dramatic variety in a photo by darkening certain aspects, while in turn highlighting others with the Dodge Tool. Together, they’ll give new life into your old photos helping them look like they were just taken … aside from the wardrobe, most likely.
Save and export
Once you’ve got your newly digitized photos just the way you want them, it’s time to save (which hopefully you’ve been doing all along) and export them as a pdf, jpg or png. Now, you’re ready to share them digitally with friends, family and loved ones using your preferred method of communication – Airdrop, email, text, etc. If you want to print physical copies to frame your newly restored photo masterpiece, make sure you use a quality printer or printing service (even if that’s just taking them to your local CVS or Walgreens).
Verdict: Can old damaged photos be restored?
Simple answer, absolutely. By using a variety of manual cleaning methods to prep vintage photos and then digitally scanning and editing them, you can get your vintage photography looking brand spanking new – at least closer to it. It’s a great solution for how to restore old photos.
We can help!
If digitizing your own photos doesn’t sound like something you’re comfortable doing – maybe you don’t have the extra time, maybe you don’t have a scanner or you’re not proficient in Photoshop – no problem. Let us help you out by digitizing them for you! It’s convenient, fast and exactly what your memories deserve.


