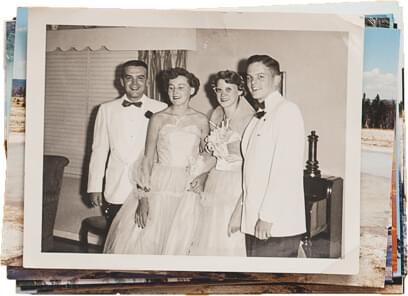

You treasure your old photos and love those cherished albums. These special collections of photos truly feel alive with memories. In an ideal world, these would provide a safe space, but many albums fail to live up to this promise. Fading and warping are common problems, leaving photos looking less vibrant.
Digitization could be the answer. Digitizing preserves special images, promising a digital format where fading and warping are not part of the picture. The process is simple: send photos to a digitization service and let us handle the rest.
The only problem? Removing these images so they can be digitized can be tricky — especially if they're stubbornly fastened to a sticky album or scrapbook. It's tempting to simply rip these photos out, but be careful: you could tear the images you're trying to preserve.
If you're feeling frustrated, you're far from alone. Thankfully, damage-free removal is possible — you just might need a few special tools or clever strategies. Keep reading to learn how sticky albums work and what it takes to remove photos once and for all.
Understanding Sticky Albums & Why Photos Get Stuck
Sticky albums offer a unique approach to storing photos. Featuring self-adhesive pages, they promise to keep pictures firmly in place without requiring typical corners or sleeves.
Also known as “magnetic photo albums,” these were a big deal in the 70s and 80s, when they were advertised as the convenient alternative to traditional photo storage. Their promise: streamline photo storage by attaching photos to album pages in a matter of seconds.
These albums seemed like a dream come true when they were first released, but unfortunately, the honeymoon period is over. Yes, adhesive makes it easier to mount photos to sticky pages, but that is where the convenience ends.
Many people have been disappointed to discover the hard work of removing photos — and the risk of tearing or destroying beloved images. Even following successful removal, the photos may be compromised by a sticky and unsightly residue.
This sparks a difficult tradeoff: leave photos in place and let them slowly fade over time — or remove them (but risk tearing) so you can preserve images through digitization.
Best Methods to Unstick Photos from Old Albums
When photos are stubbornly adhered to old sticky albums, it's natural to ask yourself, why bother removing them in the first place? The risk of residue might seem like a pain to deal with, but the risk of leaving these photos in place is even worse: sticky albums offer limited protection, so, over time, those firmly stuck photos are likely to fade or warp.
Thankfully, it's possible to unstick photos, even when they seem firmly attached to old photo albums. Be prepared to experiment with different tools or strategies.
Your goal: make photos easier to remove without damaging them in the process. When in doubt, give these trusted methods a try:
Using Dental Floss to Gently Lift Photos
Dental floss is a simple and surprisingly powerful tool for getting photos unstuck. This is a great alternative to physically tearing photos from sticky albums: the floss cuts through the bond originally created by the glue, but without damaging the photo itself. Many historians and archivists actually use this trick, often using disposable gloves to avoid getting oil on the photos.
If possible, begin with a slightly lifted photo corner and insert the floss underneath. Gently move the strip of floss side to side, just like you would if flossing your teeth. Avoid applying pressure upward, as this increases the risk of tearing. With gentle and consistent movement, you should loosen the photo enough to remove it completely from the sticky page.
Micro Spatula to Gently Lift Photos
Spatulas work wonders for removing batter from bowls — and believe it or not, the same principle applies when dealing with stubborn photos. Opt for a small spatula with a very thin blade. These are often available from archival and photo preservation providers.
Once you've invested in this tiny spatula, carefully slide it underneath the edges of the stuck photos, just like you would with a strip of floss. Move the spatula around the edges of the photo using a gentle back-and-forth motion. Keep the spatula level to avoid tearing.
Hair Dryer Method: Softening Adhesive with Gentle Heat
While dental floss and spatulas can be helpful, some especially stubborn albums call for an extra boost. This is where gentle heat can come into play. Applied with a hair dryer (ideally on low heat), this should soften the adhesive and weaken its bond with the photo.
Be careful, as this approach is more abrupt and can be riskier than using physical tools (like floss or spatulas) alone. Consider combining low heat with either floss or a micro spatula to tackle the most stubborn photos.
Adhesive Remover for Stubborn Stuck Photos
You've tried dental floss and made the most of your favorite hair dryer — but your photos remain frustratingly stuck in place. What's next? Adhesive remover may be worth a try. Products such as Un-Du target the adhesive bond with chemical processes, with solvents making adhesives less tacky or softening any residue so it can easily be wiped away.
These removers are effective but can be risky. Some users complain about the smell or feel that the dispensers are not precise enough. These solvents could also damage some delicate materials. To limit the risk of damage, apply a small amount to the corner of a less important photo and see whether it works as expected. These removers often come with spatulas or scrapers, so once you've applied some of the solution, you can use a gentle motion to manually remove the photo.
Removing Entire Pages & Cutting Around Photos
If photos seem hopelessly stuck, consider a completely different strategy: stop trying to pull the photo off, and instead, cut the excess paper away. This begins with removing the entire page from the sticky album and, one by one, cutting each photo (along with its attached paper) out. From there, you can transfer to a safer storage location. This method is generally not preferred but can work when you need a last-ditch effort to deal with stubbornly stuck photos.
Tips for Preserving Old Photographs
On the hunt for a new solution for old photos? There are many creative projects worth exploring, but depending on the collection, you may prefer archival-inspired storage. Yes, digitization and restoration are important, but you may still enjoy paging through physical copies stored in higher-quality albums. Choosing the right album and the right location is crucial.
When in doubt, make the most of acid-free pages, which offer enhanced protection. Once you've organized your photos, look for albums described as archival quality. These are purposefully designed to protect photos far into the future.
Skip the adhesives and opt for sleeves or other mounts that keep your photos intact. Avoid storing albums in humid areas, where they'll be prone to damage. Aim for storage spaces between 55 and 65 degrees Fahrenheit.
Digitizing Your Family Photographs: The Best Long-Term Solution
No matter how carefully you handle physical photos, they will remain vulnerable to damage. If you want to keep your favorite images looking pristine for years to come, you need to invest in digitization or photo scanning services. This is your chance to preserve your family history while also enjoying easy access to your favorite snapshots.
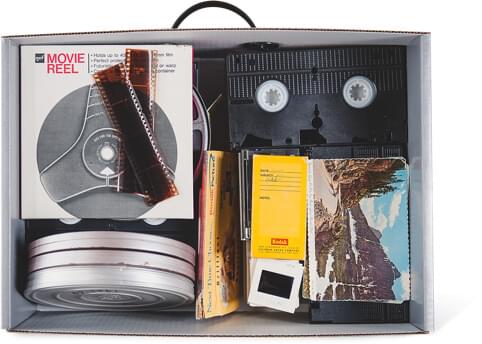
Legacybox makes this process easy: send physical photos (or other media) in a designated kit — and let our experts work their magic. Your original photos will be safely returned, and you'll also gain access to treasured images in the cloud or on a thumb drive. Get started today as you explore our digitizing kits.


